Delicious Homemade Apple Butter
This post may contain affiliate links. If you use these links to buy something we may earn a commission.
Perfect for Canning
Eat some now and can the rest! There’s nothing quite like the rich, velvety texture and warm flavors of apple butter spread over a slice of freshly baked bread or drizzled on top of pancakes. Making apple butter from scratch might sound daunting, but with the right ingredients and a little time, you can create a batch that’s incredibly tasty and perfect for canning and preserving. We’ll walk you through a step-by-step guide to crafting your own luscious apple butter that can be enjoyed year-round.
Creating your own apple butter from scratch and canning it at home is rewarding and satisfying. With the perfect balance of sweet, tart, and warm spices, this apple butter recipe will surely become a family favorite. Whether you’re preserving the flavors of the harvest season or looking for a thoughtful homemade gift, this apple butter will bring a touch of comfort and joy to every bite. So gather your ingredients, roll up your sleeves, and embark on a journey of culinary delight with this delightful apple butter recipe.
Get Your Equipment Ready
- Large pot
- Food processor or immersion blender
- Canning jars with lids and bands
- Water bath canner or large stockpot with rack
- Jar lifter
- Funnel

Delicious Homemade Apple Butter Recipe
- Total Time: 1 hour 45 minutes
- Yield: 8 – 8 ounce jars 1x
Ingredients
- 6 pounds of apples (use any apple you like)
- 2 cups of water
- 2 cups of white sugar
- 1 cup of brown sugar
- 2 teaspoons of ground cinnamon
- 1 teaspoon of vanilla extract
- 1/4 teaspoon of ground nutmeg
Instructions
- Start by washing, peeling, coring, and chopping the apples into small chunks. Removing the peels ensures a smoother texture in your apple butter.
- In a large pot, combine the chopped apples and 2 cups of water. Bring the mixture to a boil over medium-high heat.
- Once boiling, reduce the heat to low, cover the pot, and let the apples simmer for about 20-25 minutes, stirring occasionally until they are tender and can be easily mashed with a fork.
- Use a food processor or immersion blender to puree the cooked apples until you achieve a smooth consistency. If you prefer a chunkier apple butter, you can skip this step or only partially process the apples.
- Return the pureed apples to the pot and add the white sugar, brown sugar, ground cinnamon, vanilla extract, and ground nutmeg. Stir well to combine.
- Place the pot back on the stove over medium heat and bring the mixture to a gentle boil.
- Reduce the heat to low and let it simmer uncovered, stirring frequently to prevent sticking or burning. Allow the mixture to cook down and thicken for about 1 to 1.5 hours. The apple butter should become darker in color and have a rich, caramelized flavor.
- While the apple butter is simmering, prepare your canning equipment. Wash the canning jars, lids, and bands in hot soapy water and rinse well. Place the jars in a water bath canner or a large stockpot filled with water. Bring the water to a simmer. This helps to sterilize the jars and keep them warm.
- Once the apple butter has reached your desired consistency, it’s time to fill the jars. Use a funnel to carefully ladle the hot apple butter into the prepared jars, leaving about 1/4 inch of headspace at the top.
- Wipe the jar rims with a clean, damp cloth to remove any residue. Place the sterilized lids on the jars and screw on the bands until they are fingertip tight.
- Using a jar lifter, carefully place the filled jars into the simmering water in the canner or stockpot, ensuring they are fully submerged. Bring the water back to a gentle boil and process the jars for 15 minutes to ensure proper sealing and preservation.
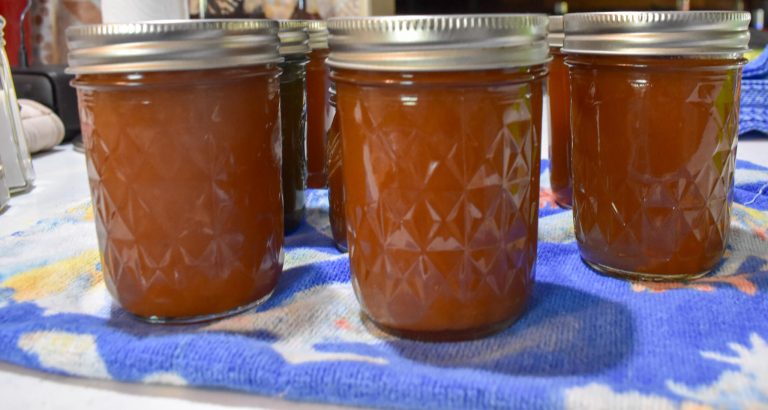
- After processing, carefully remove the jars from the water bath and place them on a clean towel or cooling rack. As the jars cool, you’ll hear the satisfying “pop” sound of the lids sealing. This indicates that a vacuum has formed, creating an airtight seal.
- Once the jars are completely cool, check the seals by pressing down on the center of the lids. If they don’t flex or move, the jars are properly sealed. Any unsealed jars should be refrigerated and consumed within a few weeks. Properly sealed jars can be stored in a cool, dark place for up to a year. When you’re ready to enjoy your apple butter, spread it on toast, pancakes, and waffles, or use it as a delicious topping for yogurt or ice cream.
- Prep Time: 15 minutes
- Cook Time: 1 hour 30 minutes
- Category: Condiments
- Method: Canning
- Cuisine: American
Enjoy and more posts below!!
Until next time,
Kari


